
Introduction
Website speed plays a critical role in user experience, search engine rankings, and overall performance. One of the most common reasons websites load slowly is unoptimized images. Large image files can significantly increase page load time, leading to higher bounce rates and lower engagement.
Optimizing images does not mean reducing quality to the point where visuals look poor. Instead, it involves balancing image quality and file size to ensure pages load quickly while maintaining a professional appearance.
In this guide, you will learn practical, beginner-friendly methods to optimize images properly and improve website performance.
Why Image Optimization Matters
Images often account for more than half of a webpage’s total size. When images are too large:
-
Pages load slowly
-
Mobile users experience delays
-
Search rankings may decline
-
Visitors leave before the page finishes loading
Faster websites offer clear benefits:
-
Better user experience
-
Improved SEO performance
-
Higher engagement and longer session times
-
Reduced server bandwidth usage
Optimizing images is one of the simplest and most effective performance improvements you can make.
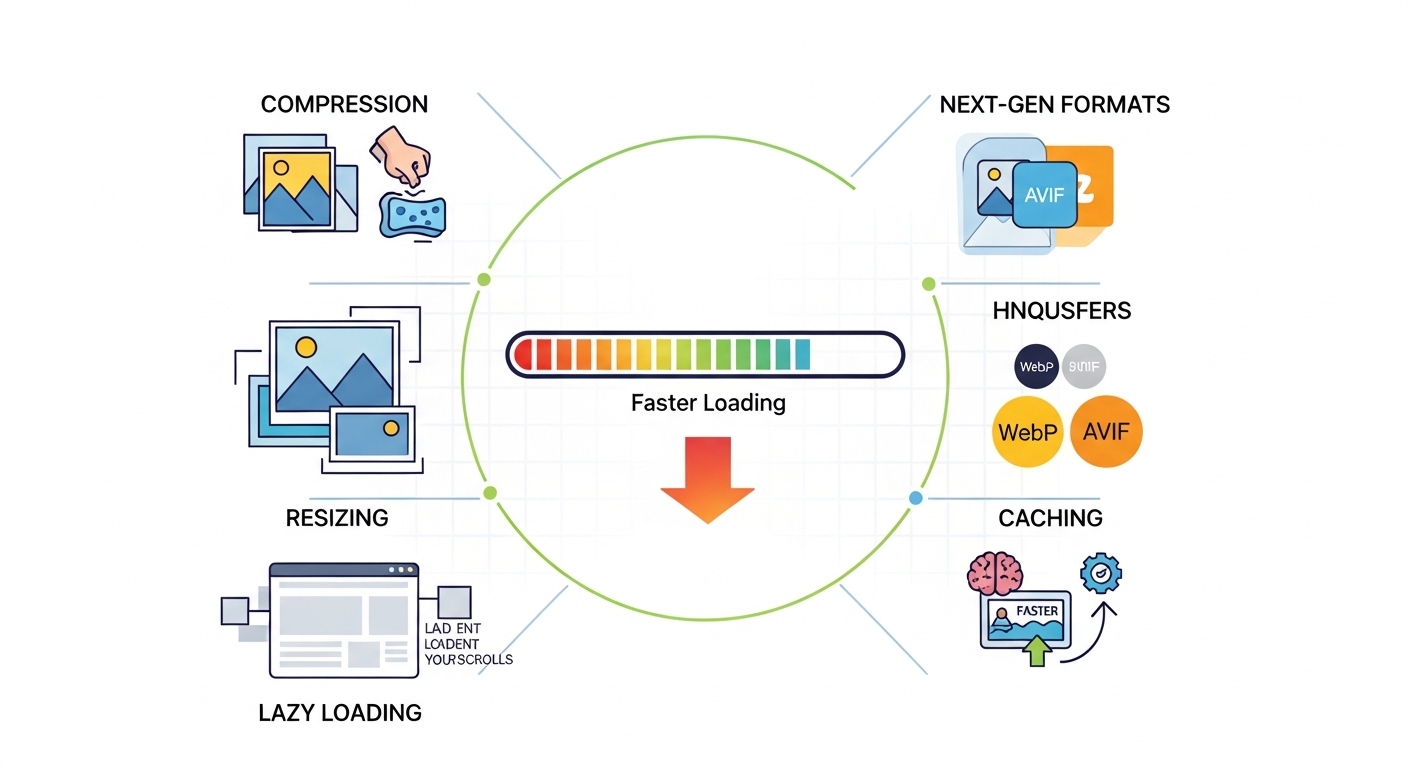
Choose the Right Image File Format
Selecting the correct file format is the first step in optimization. Each format serves a different purpose.
Common Image Formats and When to Use Them
-
JPEG (JPG)
Best for photographs and complex images with many colors.
Offers good compression with acceptable quality. -
PNG
Ideal for graphics, logos, and images requiring transparency.
Higher quality but larger file sizes compared to JPEG. -
WebP
Modern format that provides smaller file sizes with high quality.
Excellent choice for most websites. -
SVG
Best for icons and simple graphics.
Scales without losing quality and usually has a very small file size.
Choosing the correct format alone can significantly reduce page weight.
Resize Images Before Uploading
One of the most common mistakes is uploading large images and letting the browser resize them.
For example, if your website displays images at 800px width, uploading a 4000px-wide image wastes bandwidth.
Before uploading:
-
Resize images to match your actual display size
-
Avoid using images larger than necessary
-
Maintain consistent dimensions for blog posts
This simple step prevents unnecessary data from being loaded.
Compress Images Properly
Image compression reduces file size without noticeably affecting quality.
There are two types of compression:
-
Lossy Compression
Reduces file size significantly by removing some image data.
Best for blog images and general website use. -
Lossless Compression
Maintains full image quality while slightly reducing size.
Useful for graphics and professional visuals.
Popular Image Compression Tools
-
TinyPNG
-
ImageOptim
-
Squoosh
-
ShortPixel
-
Compressor.io
Most of these tools are easy to use and require no technical knowledge.
Use Lazy Loading
Lazy loading delays image loading until the user scrolls down the page.
Instead of loading all images at once:
-
Images load only when they become visible
-
Initial page speed improves
-
Server load decreases
Many modern website platforms support lazy loading by default. If not, simple plugins or built-in features can enable it.
Enable Browser Caching
Browser caching allows returning visitors to load images from their local device instead of downloading them again.
Benefits include:
-
Faster repeat visits
-
Reduced server requests
-
Improved overall performance
Caching can typically be configured through your hosting provider or website performance settings.
Use a Content Delivery Network (CDN)
A Content Delivery Network stores your images across multiple global servers. When someone visits your site:
-
Images load from the nearest server
-
Load times improve internationally
-
Website reliability increases
CDNs are especially helpful if your audience is located in different countries.
Add Proper Image Attributes
Optimized images are not only about size. Proper attributes improve performance and accessibility.
Important Image Practices:
-
Use descriptive alt text
-
Specify width and height attributes
-
Use descriptive file names (example: website-speed-optimization.jpg)
Alt text also improves accessibility and helps search engines understand your content.
Avoid Common Image Optimization Mistakes
Many website owners unintentionally slow down their pages. Avoid these mistakes:
-
Uploading full-resolution camera images
-
Using PNG for large photos unnecessarily
-
Ignoring mobile optimization
-
Adding too many decorative images
-
Forgetting to compress before uploading
Keeping images lightweight makes a noticeable difference.
How to Check If Your Images Are Slowing Down Your Site
You can test your website performance using tools like:
-
Google PageSpeed Insights
-
GTmetrix
-
Pingdom Tools
These tools highlight large image files and recommend improvements.
Regular performance checks help maintain consistent speed.
Conclusion
Optimizing images is one of the most effective ways to improve website loading speed. By choosing the right file formats, resizing properly, compressing intelligently, and using modern techniques like lazy loading and CDNs, you can significantly enhance performance without sacrificing quality.
Fast-loading websites create better user experiences, improve search visibility, and encourage visitors to stay longer. With the right image optimization practices, maintaining speed becomes simple and manageable.
Frequently Asked Questions
1. Does image optimization reduce quality?
If done properly, optimization reduces file size while maintaining acceptable visual quality. Most visitors will not notice a difference.
2. What is the best format for website images?
WebP is often the best balance between quality and file size, but JPEG works well for photos.
3. How large should website images be?
Images should match the maximum display size on your site. Avoid uploading images much larger than necessary.
4. Is lazy loading important?
Yes. Lazy loading improves initial page speed and enhances user experience, especially on image-heavy pages.